#crackDetection #tunneling #concrete #construction
Concrete
Construction
2 x 3 meter
Spallings & Missing parts
2D cameras

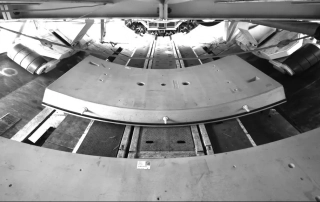
In collaboration with our customer VMT GmbH, we developed an automated solution for inspecting tunnel segments prior to installation. This system operates underground within a tunnel boring machine. It investigates the surface of the concrete for defects and checks for missing inbuilt objects. The system’s advanced sensors and imaging technology ensure that each segment meets stringent quality standards before it is used. By integrating this solution into the tunnel boring machine, we enhance the efficiency and safety of the tunneling process, reducing the risk of structural issues and costly delays
Requirement
Today, modern traffic tunnels are often built using tunnel boring machines. In the segmental lining method, the inner wall of the tunnel is lined with large precast concrete elements (segments) that form a ring. These concrete parts can sometimes have defects on the surface or in built-in components. These defects need to be detected automatically so that appropriate actions, particularly repairs, can be carried out before installation.
Challenges
The environment conditions underground lead to the following challenges:
- Comprehensive surface inspection of components up to 4 x 2 meters in size
- Difficult surface conditions (concrete)
- Little space in the machine leads to a short distance between the camera and the test object.
- high levels of contamination from mud and water on the equipment and object.
Hardware
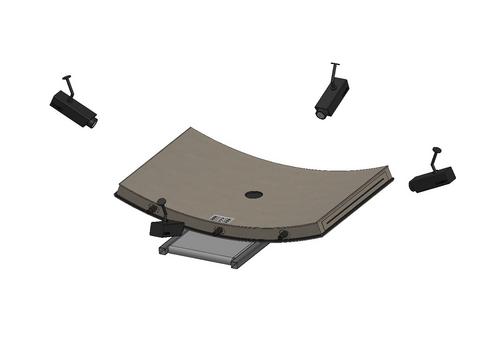
Thanks to the extensive experience of our customer VMT GmbH in tunnel construction, it was possible to design a hardware concept that works stably in the tunnel environment and is particularly protected against contamination. During the implementation of the hardware concept, good communication with the machine builder was advantageous, who was able to plan the camera positions into the construction of the machine. The final concept consists of four high-resolution 2D cameras that inspect five surfaces of the object. The data is processed on an edge device, which has advantages in terms of real-time requirements and reduced bandwidth requirements.


Software
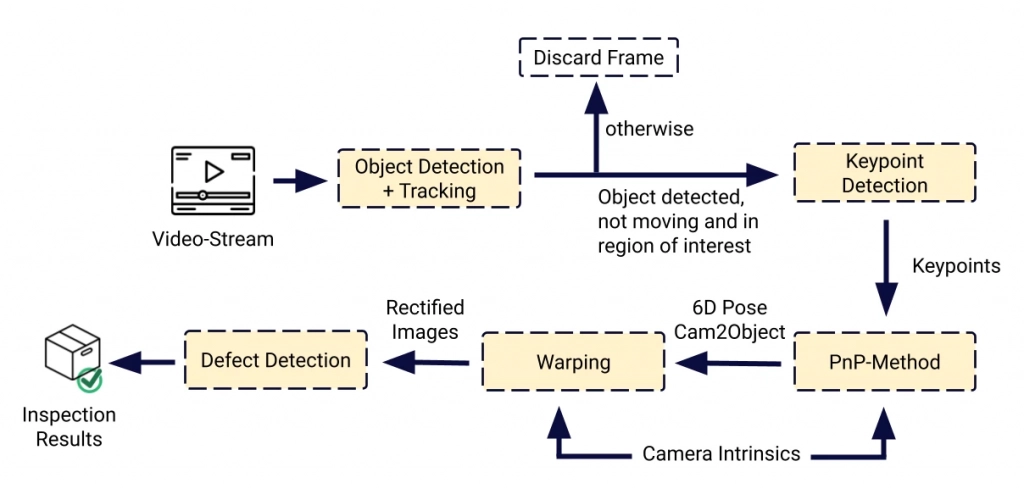
Various machine learning algorithms were trained to detect reliable defects. This is based on the in-house CVC Inspect infrastructure for machine learning pipelines. The models were implemented using the latest machine learning technologies and are defined for the detection of a total of five defect classes. A particular highlight is the first use of a software module for AI-based CAD model alignment technology using keypoint regression for surface rectification, which resulted in a in a joint research publication.
